

Understanding No Loss Derivative Bots in Trading
🤖 Explore how no loss derivative bots operate in trading, their key strategies, benefits, and risks to help South African traders automate safely.
Edited By
Emily Carter
Fibonacci retracement levels offer a simple yet powerful way to gauge potential turning points in price movements across financial markets. By spotting these levels, traders can better understand where prices might bounce or stall. This is especially useful when trading shares on the JSE, commodities like gold or platinum, and currencies involving the rand.
Developed from a mathematical sequence famous for its appearance in nature, Fibonacci levels are drawn between a recent high and low in price. They then mark key horizontal lines at percentages — typically 23.6%, 38.2%, 50%, 61.8%, and 78.6%. These percentages serve as possible support or resistance spots where prices may reverse or pause.

For example, if a share price rises from R100 to R200, retracement levels will highlight points like R176.40 (61.8%) and R138.20 (23.6%) where the market could pull back before continuing upward. Traders use these lines to plan entry and exit points or place stop-loss orders.
Fibonacci retracement is not foolproof but gives a structured method to assess market pullbacks and advances, useful alongside other analysis methods.
Key advantages include:
Helping pinpoint logical stop-loss and take-profit levels
Mapping probable support and resistance zones without guesswork
Offering visual cues for trend strength and market sentiment
However, it’s crucial to combine Fibonacci retracement with volume analysis, price action, or other technical tools. South African traders must also keep in mind local market nuances like liquidity on less active counters or effects of Eskom loadshedding on market timings.
Overall, understanding how to interpret and apply these retracement levels can sharpen a trader’s market insight, making it a valuable component of any technical trading toolkit.
Fibonacci retracement levels hold a practical place in technical analysis, helping traders and investors gauge where prices might find support or resistance. Understanding these basics can give you a clearer view of potential market turning points, which is invaluable for crafting entry and exit strategies.
Leonardo of Pisa, known as Fibonacci, was a 13th-century Italian mathematician who introduced a fascinating sequence to the world, which found uses far beyond theoretical maths. His series of numbers—starting simply as 0, 1, 1, 2, 3, 5, 8, and so on—has surprising applications in nature and finance. While Fibonacci himself lived medieval times, traders today rely on the sequence's properties to anticipate price movements.
The sequence’s magic lies in the relationships between its numbers—when you divide later numbers by earlier ones, you arrive at ratios that portray patterns in price retracements. Ratios like 61.8%, 38.2%, and 23.6% emerge from these calculations and are considered significant in technical trading. These ratios reflect proportions seen in natural phenomena—from the arrangement of leaves to pine cones—and evidently, price action too.
Fibonacci retracement focuses on commonly observed levels where a correction or reversal is likely. The main ones include 23.6%, 38.2%, 50%, 61.8%, and occasionally 78.6%. For example, if a stock price climbs from R100 to R150, a retracement to about R130 (38.2%) could signal strong buying interest. Recognising these levels helps traders anticipate where prices might stall or reverse, sharpening decision-making.
Calculating retracement starts by locating a clear price swing on a chart—a move from a low to a high in an uptrend, or high to low in a downtrend. For instance, if the JSE-listed stock Sasol moves from R300 to R360 before pulling back, this entire move forms the basis for applying retracement levels.
Retracement levels measure how far the price pulls back relative to the initial swing. This involves calculating specific percentages of the total swing — the difference between the high and low points. Traders then apply these percentages to the price swing to spot potential support or resistance zones. For example, a 61.8% retracement on Sasol would mark the price around R323, a level to watch for possible trend resumption.
While numerous ratios exist, most rely on the five key percentages: 23.6%, 38.2%, 50%, 61.8%, and 78.6%. The 50% level, although not derived from Fibonacci mathematics, is widely accepted as a critical halfway retracement, reflecting traders’ tendency to see it as a pivotal point. These ratios guide traders not just in spotting price targets but also in placing stop-loss orders and planning profitable exits.
Understanding these basics is essential before using Fibonacci retracement tools—it equips you with a foundation to interpret price action and market behaviour more effectively, especially when combined with other technical indicators.
Fibonacci retracement levels help traders pinpoint where prices might stall or bounce back during a trend. Applying these levels within market analysis offers concrete reference points rather than guessing potential support or resistance. This method aids in making better-informed entry and exit decisions, especially in volatile markets like the JSE or local forex pairs.

In an uptrend, retracement levels mark where prices could pull back before pushing higher again. For example, if a share in the Top 40 climbs from R100 to R120, retracement levels like 38.2% or 50% highlight zones near R111.60 or R110 where buying interest might re-emerge. Traders watch these spots for a dip to bottom out, signalling continued strength.
Conversely, during a downtrend, retracement levels suggest where short-lived price retracements might be met with fresh selling pressure. A platinum price falling from R900/kg to R800/kg could see a brief lift near the 61.8% retracement around R859, offering a chance to enter a short trade as the downtrend resumes.
These retracement levels are not only guides for pullbacks but also help locate areas where prices could reverse. If multiple retracement levels cluster close with previous support or resistance points, this zone gains credibility. For instance, when gold prices retrace to a 50% level that aligns with a well-tested support, it often signals a likely reversal.
Traders should watch for price action signals like candlestick patterns or confirmation from momentum oscillators around these retracement zones before placing trades to increase the edge.
Fibonacci retracement lines work best when they coincide with established support or resistance levels. If a retracement level overlaps with a historical resistance on the chart, this zone becomes more reliable as a barrier to price moves. In this way, Fibonacci can confirm existing market patterns rather than standing alone.
Integrating moving averages with Fibonacci levels can improve trade timing. For example, if a retracement level sits near the 20-day moving average during an uptrend, this dual support strengthens the case for a bounce. Similarly, trendlines drawn to connect recent lows or highs can intersect retracement levels, adding another layer to identify key price zones.
Volume spikes or shifts in momentum indicators near Fibonacci retracement levels lend weight to the validity of those zones. If a price retraces to a Fibonacci level and volume suddenly rises or RSI picks up from oversold levels, this suggests stronger conviction by market participants.
Using these tools in combination helps traders avoid relying solely on Fibonacci levels, reducing false signals caused by market noise. For example, during Gauteng’s volatile markets, such layering of analysis helps filter out random price moves affected by loadshedding or news events.
Practical examples and strategies help bridge the gap between theory and real trading situations. They offer a hands-on look at how Fibonacci retracement levels play out in the market, making the concept easier to grasp. For traders, these examples provide concrete scenarios to learn from and adapt to their own trading styles.
Fibonacci retracement levels are valuable tools when analysing stocks listed on the Johannesburg Stock Exchange (JSE). These levels can indicate where prices might find support or resistance during a correction phase, helping traders decide when to enter or exit positions. For instance, if a blue-chip like Sasol or Naspers rallies strongly and then pulls back, traders might watch the 38.2%, 50%, or 61.8% retracement levels closely as potential bounce points.
Using these levels in share trading provides clearer guidance amid the volatility often seen in JSE shares, especially during times of political or economic uncertainty. It can also help when the market reacts to local factors like changes in interest rates by the South African Reserve Bank or fluctuations in the rand.
Take a recent pullback in Aspen Pharmacare shares. After hitting a recent high, the stock retraced close to the 50% Fibonacci level before stabilising and moving higher again. Traders who recognised this retracement level as a possible support were able to position themselves advantageously, with tighter risk limits.
This example shows how Fibonacci retracement tools can help identify turning points without relying solely on guesswork. By combining Fibonacci with volume data and moving averages, traders get stronger confirmation to back their decisions.
In the forex market, Fibonacci retracement levels are widely used to assess pullbacks in major currency pairs such as USD/ZAR, EUR/USD, and GBP/USD. South African traders especially monitor USD/ZAR for clues on exchange rate movements due to the rand’s sensitivity to commodity prices and political developments.
Traders can use Fibonacci levels to find entry points during a trending market. For example, if USD/ZAR is in an uptrend but experiences a temporary pullback, retracement levels like 38.2% and 61.8% can signal where the price might resume its rise. Awareness of these levels improves timing and risk control.
Gold and platinum are significant to South African investors and traders due to the country’s large mining sector. Fibonacci retracement helps in analysing price swings in these commodities, which often react to global demand, geopolitical risks, or local mining strikes.
When gold prices retreat after a rally, common Fibonacci levels serve as possible support zones, giving traders clues on when buying pressure may return. Similar principles apply to platinum, where retracement levels assist both short-term traders and longer-term investors in capturing price moves.
In all cases, combining Fibonacci retracement levels with other market data and indicators sharpens your strategy and helps avoid misreading temporary price moves.
Traders often turn to Fibonacci retracement levels because they provide a straightforward way to identify potential entry and exit points in a market. However, like any tool, understanding both the strengths and weaknesses is essential before relying on it heavily in your trading routine.
Fibonacci retracement levels provide traders with clear, easy-to-spot horizontal lines that suggest where prices may pause or reverse. For instance, if a JSE share has surged from R100 to R150, the 38.2%, 50%, and 61.8% retracement levels give likely price points between R119 and R131 where the stock might find support on a pullback. This visual simplicity helps traders place stop-loss orders or prepare to take profits with more confidence. It suits those who prefer to combine price action with strategic thresholds rather than guesswork.
The widespread use of Fibonacci levels means they often gain self-fulfilling significance. When many players watch the same retracement points, these areas tend to attract more attention and action, making them stronger support or resistance zones. For example, MTN or Sasol shares might repeatedly react to these levels due to collective trader behaviour, strengthening their reliability. This shared recognition makes Fibonacci retracement valuable in crowded markets where timing matters.
One major limitation is the subjectivity in picking the correct price swings to draw your Fibonacci lines. Different traders may select peaks and troughs differently, leading to varying retracement zones. Consider a volatile currency pair like USD/ZAR—a trader picking a swing high from a week ago versus a more recent high can end up with quite different retracement interpretations. This subjectivity demands experience and a good read of market context to avoid misleading signals.
Fibonacci levels are not foolproof and can give false signals, especially during choppy or sideways markets. Prices may briefly touch or break these levels without establishing a genuine reversal or support, luring traders into premature entries or exits. For instance, during periods of Eskom loadshedding that upset trading volumes, charts often show erratic price behaviour that doesn't respect Fibonacci boundaries. Traders should combine Fibonacci analysis with volume, momentum indicators, or trendlines to reduce noise impact and improve decision-making.
While Fibonacci retracement offers handy guideposts for market movements, using it alongside other tools and maintaining awareness of its subjectivity and limitations will better position traders for consistent results.
Incorporating Fibonacci retracement levels into your daily trading routine can sharpen your ability to spot key turning points in the market. This tool offers visual guides to potential support and resistance, which are critical when deciding on entry and exit points. For South African traders, whose markets might be impacted by local conditions like loadshedding or exchange rate volatility, reliable tools such as Fibonacci can add clarity amid uncertainty.
Most local traders use platforms like Think or Swim, MetaTrader 4/5, or even the Webtrader from FNB's trading app. These platforms come equipped with built-in Fibonacci retracement tools, which make it easy to place and adjust levels directly on price charts. Choosing a platform that supports intuitive drawing tools is essential for quick reactions during volatile sessions, especially when dealing with JSE-listed shares or fast-moving forex pairs like USD/ZAR.
Customising these tools helps tailor them to your trading style. For example, adjusting the colour and thickness of retracement lines can improve visibility, especially in crowded charts where trendlines and moving averages also compete for attention. Some platforms allow you to save presets, so your favourite levels—usually 23.6%, 38.2%, 50%, 61.8%, and 78.6%—are ready to drop after identifying a swing high and low. This cuts down the time it takes to analyse and lets you focus on making decisions, not setting up tools.
Fibonacci retracement offers natural points to consider stop-loss and take-profit orders. Placing your stop-loss just beyond a retracement level can limit losses if the price moves against your position. For instance, if you buy a locally traded commodity like platinum at the 61.8% retracement from a recent low, you might place a stop-loss slightly below the 78.6% level to shield yourself from deeper retracements or trend reversals.
Balancing Fibonacci analysis with other criteria is vital for robust trade planning. Solely relying on these levels can be risky because markets sometimes ignore technical zones. Combining retracement insights with volume analysis, momentum oscillators like RSI, or trendline breaks improves your probability of success. For example, if a Fibonacci level aligns with a well-established moving average on a currency pair like EUR/ZAR, your confidence that this zone will hold increases. This layered approach is especially useful during South Africa's festive season when market liquidity thins and price swings can become erratic.
Effective trading routines blend tools like Fibonacci retracement with sound risk management and multiple technical signals to navigate South African markets with confidence.
Integrating Fibonacci retracement into your setup is not just about drawing lines—it’s about applying these lines within a bigger framework of market awareness, practical risk controls, and consistent trade planning. Together, these habits can help you make more informed decisions and manage your positions better in the ever-challenging local trading environment.
🤖 Explore how no loss derivative bots operate in trading, their key strategies, benefits, and risks to help South African traders automate safely.

📈 Learn trading basics, strategies, and risk management in our practical guide series. Ideal for anyone ready to trade confidently in South African markets.
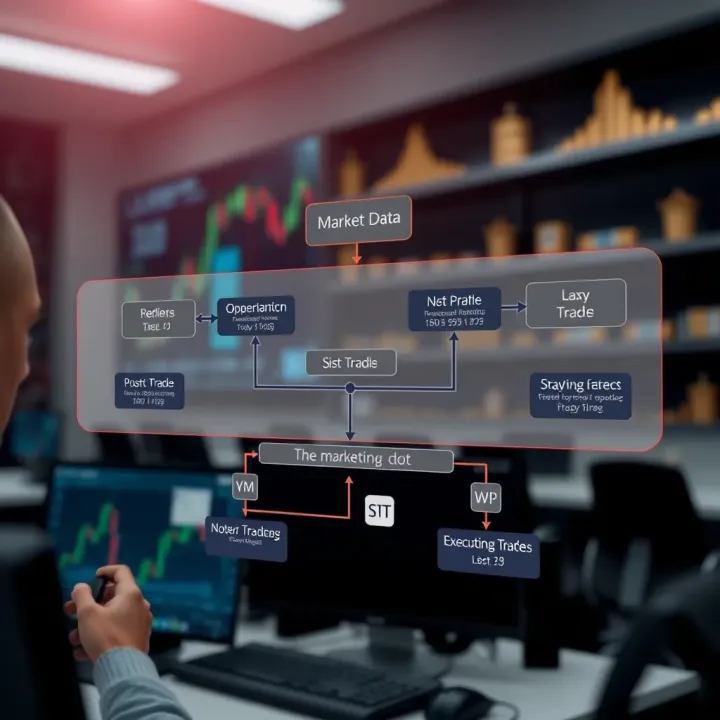
🤖 Learn how free trading bots work, their benefits and risks, plus practical tips for South African traders to automate trades safely and effectively with no upfront cost.

📊 Understand surge trading with strategies, risk management, tools, beginner tips & regulations to trade sudden market moves confidently in South Africa.
Based on 12 reviews